A little care at setup saves a lot of correcting later. Your own details appear on every invoice, and your VAT status decides what those documents may contain. This guide goes through setting up Taxorio for a Czech sole trader — an OSVČ — from registration to the first invoice, and flags the choices that are awkward to change afterwards.
Step 1: Register and sign in
Open app.taxorio.cz and create an account. There are two ways in:
- A Google account — sign-in handled by Google, with no separate password to remember.
- E-mail and password — ordinary registration; confirm the address from the message you receive.
After the first sign-in a short onboarding wizard opens with three steps: your company, your address, and optional banking and tax details. Everything it asks for can be changed later in Settings, so a detail you do not have to hand is not a reason to stop.
Step 2: Business details
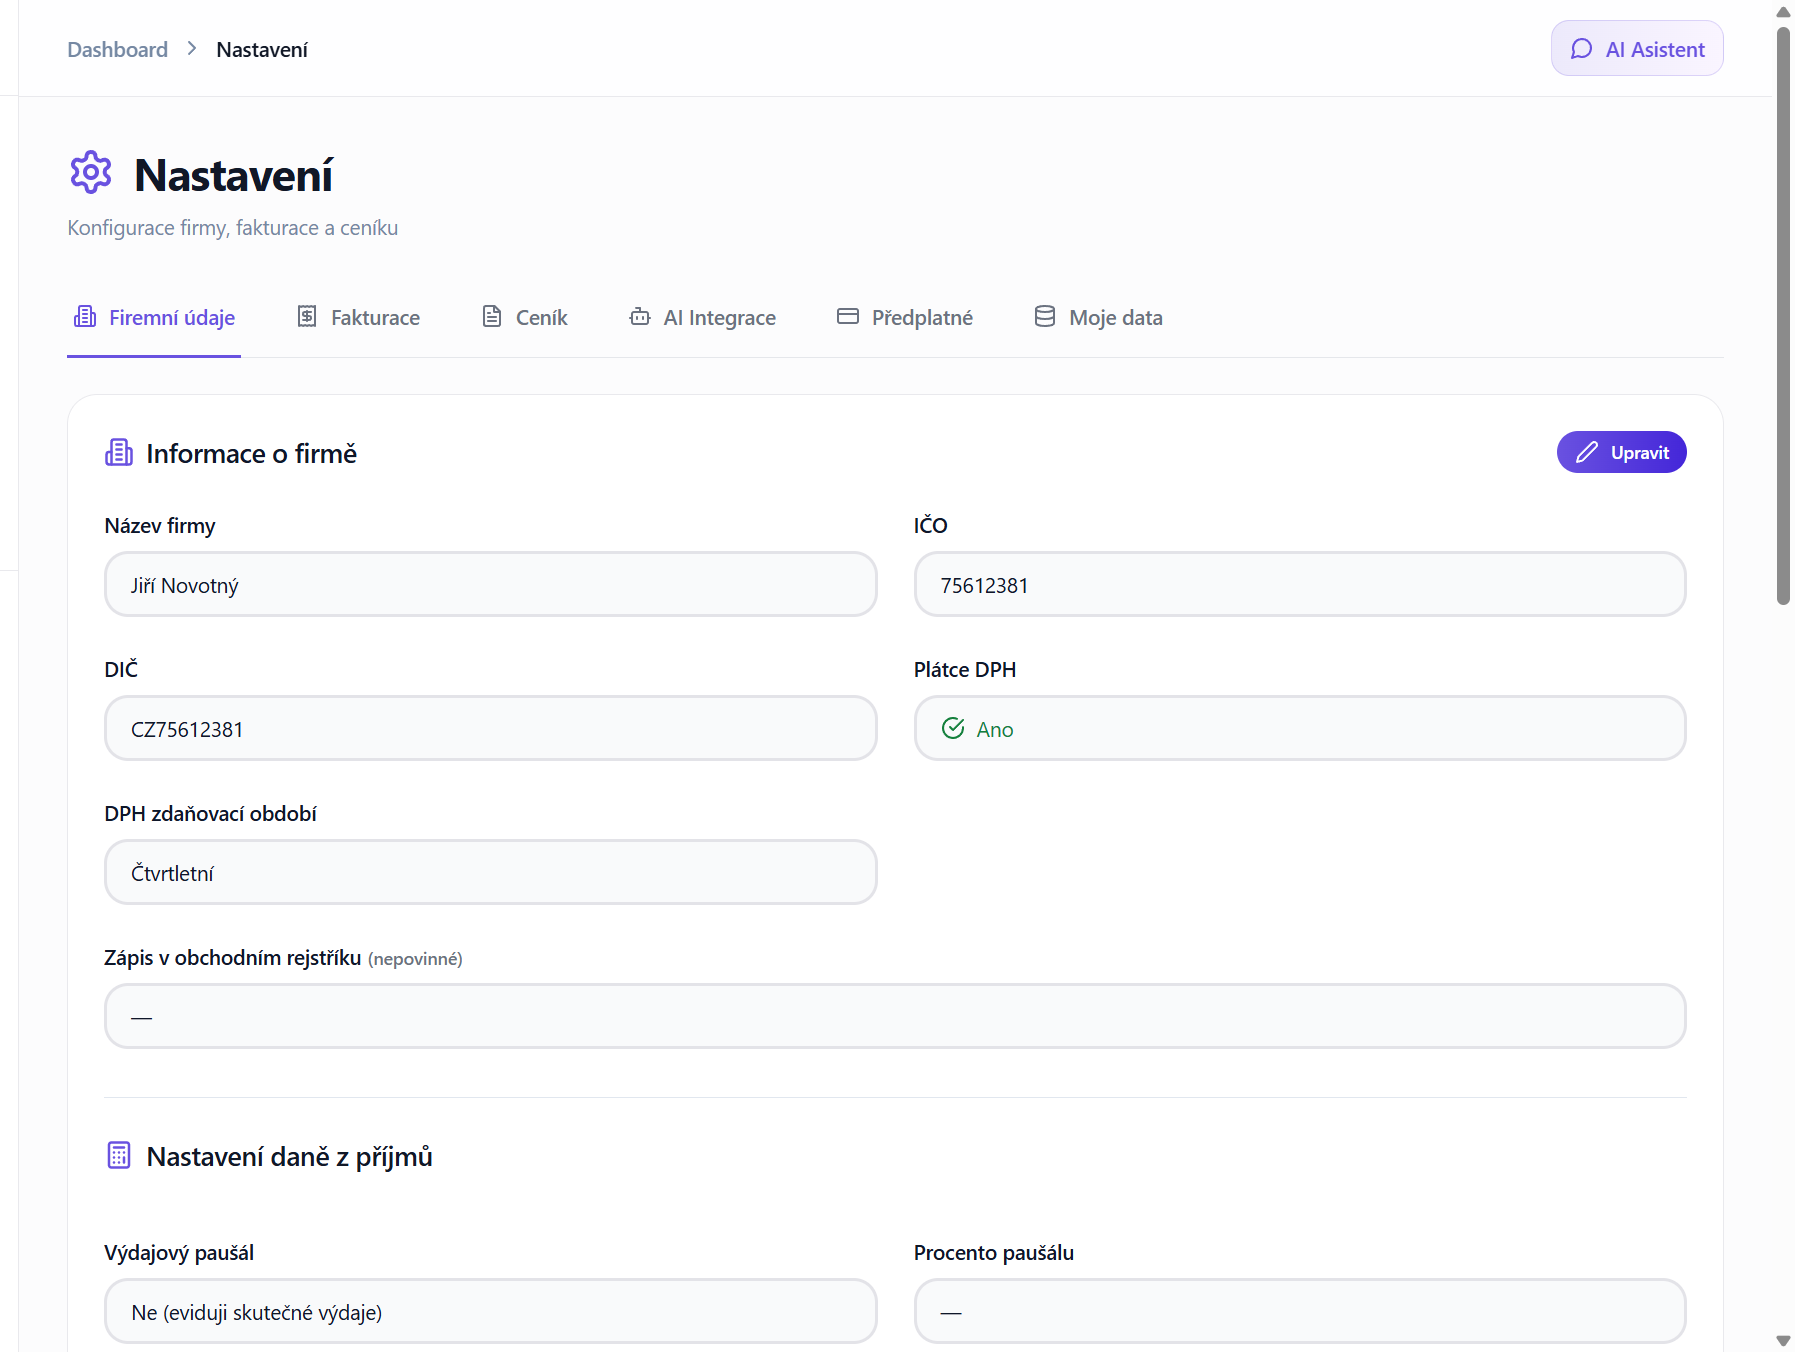
Start with your IČO, the eight-digit Czech business identification number. Taxorio looks it up in ARES, the public register of economic subjects, and prefills the rest: the registered name, the address and whether the register shows you as VAT-registered. Check what comes back and correct anything that does not match; if ARES is unavailable, fill the fields in by hand.
- Company name — your trading name, or your own first name and surname as an OSVČ.
- IČO — eight digits.
- DIČ — the tax identification number, required for a VAT payer and for an identified person.
- VAT status — non-payer, identified person or VAT payer.
These details print on every invoice as the supplier, so they should match the trade register. A sole trader who is not registered for VAT or as an identified person often has no DIČ at all (since 2024 sole traders no longer register separately for income tax); only the DIČ of a VAT payer or an identified person is printed on invoices.
Non-payer, identified person or VAT payer
This is the setting with the widest reach, because it changes what the app lets you do.
- Non-payer — the usual starting point. You do not charge Czech VAT and your invoice items stay at 0%.
- Identified person — a non-payer who has to account for VAT on services or goods received from abroad and on cross-border supplies. An identified person remits that VAT but has no right to deduct input VAT and does not file a control statement. Registration can be triggered by a single foreign software subscription.
- VAT payer — registered for VAT with the tax office. Invoices then show the taxable amount and VAT, you can record VAT deduction on expenses, the VAT return and control statement exports become available, and you also choose whether you file monthly or quarterly.
A DIČ shown in ARES does not prove VAT registration — non-payers have one too. A VAT payer holds a certificate of registration from the tax office. If you are not sure, check before you invoice rather than after.
Flat tax
The wizard also asks whether you are in the paušální daň regime — the flat tax that replaces the income tax return with one fixed monthly payment covering income tax, social security and health insurance. It cannot be combined with VAT-payer status, though an identified person may use it. Answer according to your actual registration: the setting tells Taxorio how to calculate, it does not register you for anything.
Step 3: Business address
Street and number, postcode and city, plus a contact e-mail and phone. The address appears on your invoices and should match the one in the trade register. If it arrived from ARES, read it rather than assume it.
Step 4: Bank details
- Account number — in the Czech format, prefix and number.
- Bank code — four digits.
- IBAN — worth adding for clients abroad.
- BIC/SWIFT — for international payments.
- Bank name — shown on the invoice.
An account number with its bank code is enough for the payment QR code: Taxorio computes the Czech IBAN from the two. You can keep several accounts — for instance one in CZK and one in EUR — and choose which one a particular invoice asks the client to pay. A foreign-currency invoice needs an account in that currency before it can carry a QR code.
Step 5: Invoicing settings
Invoice numbering
Numbers use the fixed format YYYYXXXX: the year followed by a sequence number padded to four digits, for example 20260001 and 20260002. The pattern itself is not configurable.
The starting counter
What you do set is the counter the next invoice continues from. If you are moving from another system and want the series to run on, set it before issuing anything: after 50 invoices elsewhere this year, set the counter to 51. Changing it later leaves a gap in the series that you will have to explain.
Default payment term
Fourteen days by default, with quick choices of 7, 14, 30 and 60 days and a free field for anything else. The due date on a new invoice is prefilled from it, and you can still change it on the individual document.
VAT rate on invoice items
The rate is not chosen in Settings but on each invoice item. For a VAT payer a new item starts at 21%, the rate for most services; switch it to 12% for the goods and services listed in the VAT Act. For a non-payer and an identified person items stay at 0%, because they must not charge Czech VAT on an ordinary sales invoice. Items you bill repeatedly can be saved in the price list, where each one keeps its own unit and VAT rate.
Step 6: PDF template and QR payments
Taxorio offers three PDF templates, a colour scheme to go with them and an editable footer line:
- Aurora — the default for new accounts.
- Modern — a clean layout with colour blocks.
- Classic — vertical section labels and a prominent payment strip, for a more formal look.
The choice applies to every newly generated PDF and can be changed at any time. Switch on the QR code in the same section: it uses the SPD format of the Czech Banking Association and carries the account, amount, variable symbol and currency. It is printed only on an issued or overdue invoice, never on a paid or cancelled document, a credit note or a tax document for an advance received.
Step 7: Company logo
You can upload a logo — PNG or JPEG, up to 2 MB, ideally 400 by 200 pixels or larger — and it appears in the header of every PDF invoice. It is optional: an invoice without a logo is exactly as valid. Taxorio does not print a scanned handwritten signature, and a Czech tax document does not need one.
Step 8: Percentage expenses
If you claim expenses as a percentage of income instead of documented costs, set the rate that matches your activity under § 7(7) of the Income Taxes Act:
- 80% — craft trades and agricultural production, up to CZK 1,600,000 a year.
- 60% — other trades, up to CZK 1,200,000 a year.
- 40% — other income from independent activity, up to CZK 800,000 a year.
- 30% — rental income, up to CZK 600,000 a year.
The setting feeds the estimates on the dashboard and in the tax overviews. Skip it if you claim actual expenses, and note that in the flat-tax regime expenses are not tracked at all, so the percentage does not apply there.
Step 9: Tax office
Select the tax office you belong to and, if you know it, its local branch. Once the address is filled in, Taxorio suggests the office matching your postcode — treat the suggestion as a starting point and confirm it. The detail is used when generating tax documents. You can also record your main activity by its CZ-NACE code.
Step 10: Add the first client
Open Clients and then New client. The quickest route is again ARES: enter the client's IČO and search. Taxorio prefills the company name, registered address, DIČ where the register holds one, and the legal form. Check the result and save it. For a client without a Czech IČO — a company abroad, or a private individual — fill the details in manually.
Step 11: Issue the first invoice
Everything is now in place. Go to Invoices, choose New invoice and follow the step-by-step guide to creating an invoice in Taxorio.
Where the settings live afterwards
The Settings menu keeps everything in three groups:
- Business and taxes — company details, bank accounts, tax regime.
- Invoicing and documents — invoicing, reminders, price list, expense deductions, payment matching, documents by e-mail.
- Account and data — subscription, AI integration (the remote MCP connector, part of the PRO plan), data export and import, mobile app.
Common setup mistakes
A VAT status that no longer matches reality
If you registered for VAT, or became an identified person, update the setting straight away. Taxorio applies the status to the whole year and does not record the date you changed over, so documents issued under the old status will be wrong in both directions.
Missing bank details
Without an account number and bank code there is no QR code, and the client has nowhere to send the money. This is the most common reason behind a “the QR code is not working” question.
The starting counter set too late
Set the counter when you switch systems, not after the first few invoices. Gaps in a numbered series are hard to explain during an inspection.
Tip: when the setup is done, issue a test invoice and read the generated PDF. Check the details, the position of the logo and the QR code — scan it in your banking app and see whether the prefilled account, amount and variable symbol are right. Then cancel the test document.
With this in place you have an invoicing system that matches how you actually trade. The help centre covers the same ground step by step in first steps and company setup, and support is reachable from inside the app.
Taxorio scope: Taxorio provides invoicing and income/expense records for Czech sole traders. It is not full accounting or personalised tax advice. For an unsupported or unusual case, verify the treatment with a Czech accountant or tax adviser before filing.